
I often see hydraulic hose failures[^1] caused not by bad hoses, but by wrong crimping[^2]. A small mistake can lead to leaks, downtime, and safety risks.
Common crimping mistakes come from wrong setup, poor inspection, and lack of testing, all of which reduce hose reliability.
If you want safer hose assemblies and fewer failures, it helps to understand where crimping usually goes wrong.
How to use a hydraulic hose crimper?
Using a hydraulic hose crimper correctly is the first step to avoiding most crimping mistakes.
Correct crimper use means proper hose preparation[^3], correct die selection, accurate settings, and full-cycle crimping.

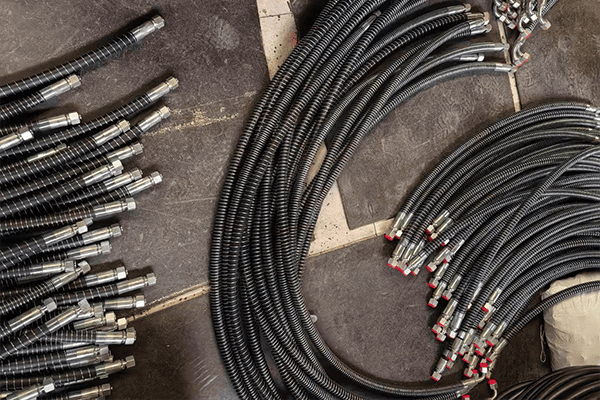
When I use a hydraulic hose crimper, I always start with hose preparation[^3]. The hose must be cut square, not angled. A bad cut causes uneven compression. After cutting, I clean the hose end to remove rubber dust and steel particles. These small things affect sealing more than many people expect.
Next, I select the correct die set. Every hose and fitting combination has a recommended die and crimp diameter. Using a “close enough” die is one of the most common mistakes I see in workshops. Even a small mismatch changes the final crimp result. I then set the crimp diameter[^4] according to the crimp chart, not by feel or experience alone.
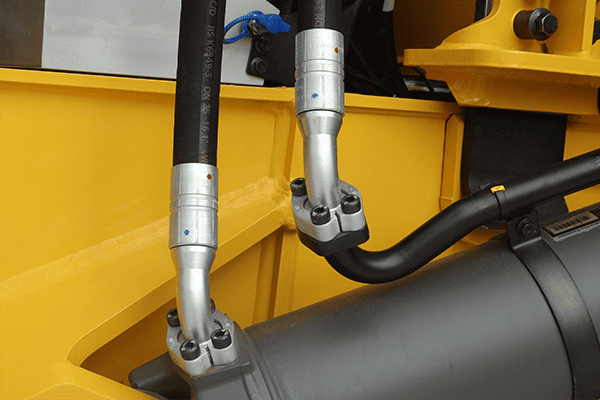
During crimping, I make sure the fitting is fully inserted and aligned straight. I never stop the machine halfway. A full crimp cycle ensures even pressure around the fitting. After crimping, I measure the outside diameter with a caliper and compare it to the specification.
Correct Crimper Use Steps
| Step | Action | Why It Matters |
|---|---|---|
| Hose cutting | Cut square and clean | Prevent uneven crimp |
| Die selection | Match hose and fitting | Ensure correct compression |
| Machine setup | Set exact crimp diameter[^4] | Avoid over or under crimp |
| Full crimp cycle | Do not stop mid-crimp | Ensure uniform pressure |
| Measurement | Check OD with caliper | Confirm crimp quality |
Using the crimper the right way prevents most early hose failures.
How to crimp perfectly?
Perfect crimping is not about speed. It is about consistency, measurement, and discipline.
A perfect crimp meets specification, looks uniform, and passes inspection and testing.

In my experience, perfect crimping starts with respecting data, not habits. Many operators rely on past experience and ignore updated crimp charts. That creates variation. I always follow the manufacturer’s data for hose type, fitting model, and crimp diameter[^4].
Another key point is visual consistency. A good crimp looks even around the entire circumference. There should be no sharp edges, cracks, or bulging. The fitting should sit straight on the hose. If it looks wrong, it usually is wrong.
Measurement is non-negotiable. I always measure at several points around the crimp. A perfect crimp stays within tolerance everywhere, not just at one spot. I also label and record crimp settings for repeat jobs. This helps keep results consistent, especially when different operators use the same machine.
Elements of a Perfect Crimp
| Element | What to Check | Result |
|---|---|---|
| Diameter | Within tolerance | Secure seal |
| Shape | Even and round | Balanced pressure |
| Alignment | Straight fitting | No side load |
| Surface | No cracks or marks | Long service life |
Perfect crimps come from repeatable processes, not luck.
How to test a crimp connection?
Testing a crimp connection confirms whether your crimping process actually works.
Crimp testing checks strength, sealing, and reliability under pressure or load.

I rely on three main tests: visual inspection, pull testing, and pressure testing. Visual inspection is the fastest. I look for cracks, uneven compression, exposed reinforcement, or fitting movement. If any of these appear, the hose fails immediately.
Pull testing checks mechanical strength. The hose is pulled until a specified force is reached. If the fitting moves or pulls out, the crimp is not qualified. This test is common in factory environments.
Pressure testing is the most realistic. The hose assembly is filled with fluid and pressurized to working pressure or higher. If there is leakage, swelling, or sudden failure, the crimp is not acceptable. I prefer hydrostatic testing because water is safer than oil.
Common Crimp Test Methods
| Test Type | Purpose | Typical Use |
|---|---|---|
| Visual inspection | Detect obvious defects | Every hose |
| Pull test | Check mechanical strength | Quality control |
| Pressure test | Verify sealing and safety | Critical systems |
Testing is how I turn a “good-looking” crimp into a proven one.
What are the failure modes of crimping?
Crimping failures usually fall into a few clear patterns.
Most crimping failures are caused by under-crimping[^5], over-crimping, or misalignment[^6].

Under-crimping happens when the fitting is not compressed enough. The hose may look fine but can leak or blow off under pressure. Over-crimping compresses the hose too much. This damages reinforcement and reduces pressure capacity.
Misalignment is more subtle. If the fitting is not straight, pressure is uneven. This causes localized stress and early failure. Another failure mode is wrong hose-fittings pairing. Even a perfect crimp cannot fix incompatible components.
Environmental damage after crimping is also a factor. Heat, vibration, and abrasion attack weak crimps first. That is why correct crimping must match the application, not just the machine setting.
Common Crimp Failure Modes
| Failure Mode | Cause | Result |
|---|---|---|
| Under-crimp | Large diameter | Leaks or blow-off |
| Over-crimp | Excess compression | Burst or flow restriction |
| Misalignment | Poor insertion | Early fatigue |
| Wrong pairing | Incompatible parts | Sudden failure |
Knowing failure modes helps me trace problems back to the root cause.
What causes poor crimping?
Poor crimping rarely has one single cause. It is usually a system problem.
Poor crimping is caused by wrong tools[^7], bad setup, lack of training, and skipped inspections.

I often see workshops using worn dies. Dies wear slowly, so the problem builds over time. Without regular inspection and replacement, crimp accuracy drops. Another cause is poor calibration. If the crimper is not calibrated, the setting on the dial means nothing.
Human factors matter too. Rushing jobs, skipping measurement, or guessing settings leads to poor results. Training is also critical. Even a good machine produces bad crimps if the operator does not understand hose structure and fitting design.
Finally, ignoring crimp charts is a big issue. Each hose brand and fitting series is different. Mixing data across brands creates unpredictable results.
Causes of Poor Crimping
| Cause | Example | Impact |
|---|---|---|
| Tool wear | Old dies | Inconsistent crimps |
| No calibration | Wrong diameter | Unsafe assemblies |
| Poor training | Guessing settings | High failure rate |
| Wrong data | Mixed brands | Unstable quality |
Good crimping quality always starts with good discipline.
What are the three main types of failures?
From my experience, most crimp-related problems fall into three main failure types.
The three main failures are leakage, fitting pull-off, and hose burst.

Leakage is the most common and often the first sign of trouble. It usually comes from under-crimping[^5] or surface damage. Fitting pull-off is more dangerous. It happens when the fitting separates from the hose under pressure. This is often caused by wrong crimp diameter[^4] or wrong hose-fittings combination.
Hose burst is the most severe failure. It is often linked to over-crimping[^8], which damages reinforcement. The hose may pass initial inspection but fail suddenly during operation.
Each failure type points to a different mistake in the crimping process. That is why failure analysis is so important.
Three Main Crimp Failure Types
| Failure Type | Typical Cause | Risk Level |
|---|---|---|
| Leakage | Under-crimp | Medium |
| Pull-off | Wrong setup | High |
| Burst | Over-crimp | Very high |
Understanding these failures helps me prevent them before they happen.
Conclusion
Most crimping mistakes come from wrong setup, poor inspection, and ignoring specifications. Correct tools, measurement, and testing prevent leaks, failures, and safety risks.
---

[^1]: Understanding the causes of hydraulic hose failures can help you prevent costly downtime and ensure safety.
[^2]: Exploring the effects of wrong crimping can help you improve your crimping techniques and avoid failures.
[^3]: Understanding the significance of hose preparation can lead to better crimping results and fewer failures.
[^4]: Finding the right crimp diameter is essential for ensuring the integrity of your hose assemblies.
[^5]: Learn about the dangers of under-crimping to prevent leaks and ensure safe operation.
[^6]: Understanding misalignment can help you achieve better crimp quality and reduce failure rates.
[^7]: Identifying the right tools for crimping can significantly improve your crimping outcomes.
[^8]: Discover the negative impacts of over-crimping to maintain the integrity of your hose assemblies.